
So how do you Mill a Log?
I get asked this question all the time. Most folks have never seen a sawmill run, let alone understood a little about what goes into making lumber. I am no expert, but I get better with every log. For a while I have been meaning to do a little pictorial piece here that I can refer folks to when they ask. So here goes, but fair warning, this is likely to be a little long. Grab a cup of coffee first.
First some ground work. Every log is different, just like snow flakes. Every log has different challenges and different decisions are made all along the way. One must decide the intended purpose of the wood first to decide how best to get the most out of it. Then one must examine the log looking at the defects and deciding which of these must go, which might stay, and which might be most desirable. All defects detract from the logs value as lumber in theory. (Lumber grading is a Black Art I will not get into here in any way, I don’t understand it, and I don’t think a lot of lumber graders do either.) Defects would be knots, metal, different colors not normal with that particular species, odd grain patterns, odd log shape, cracks, splits, and anything else that varies from that perfect board. Now to be sure, some of these very defects are in fact quite desirable to certain users and can add cost. Spalting is a defect, but a lot of folks look for spalted wood. Color streaks are also sought after by many people, and the list goes on. So you have to make choices as you work with each log. (By the way, this is what I am referring to when I say ‘the log tells me what it should be’. It’s not like I talk to logs, well, not directly, but they talk to me and I try to listen.)
So as I am still dealing with a back injury healing up, I chose a small log for this experiment to make the handling easier. Before I even put the log up it is ‘scaled’. Scaling a log is normally done to determine the sale cost of that log. This means I measure the log at the small end diameter and plug that, and the log’s length into my special calculator to get the numbers I want. This can also be done with a tape measure and a printed chart, it’s not magic. I have an 18” diameter Maple log on the small end (SED) and it is 5’ long. My calculator tells me it’s green weight is 550 pounds and should produce 65 Board Feet (BF) of lumber. Now this tree was long dead when it was cut and the log has been drying a long time on the stump. The actual weight now is probably 100 pounds lighter than that. Now I don’t have to scale my logs before I mill them, but I like to keep track of how much I get out of the log when it’s all done and compare that to the prediction. It’s part of the learning process. I can tell you already that because this log is short and not something I would normally mill, it will probably come up very short of the prediction. The calculations get much more accurate when you work with logs of 8 and 12’ or more. I use the ‘International 1/4” scale’. There are about 5 different scaling ‘standards’ (Dole, Scribner, Scribner table, International 1/4 and 1/8 scales) and they each have their strengths and weaknesses for estimating a log’s output. I use the International 1/4” because it is common around here and has proven to be the best estimate for MY output, except in very short logs. When I buy, I prefer to buy on the Doyle scale for other reasons. Yes, it can be complicated and take a little time to get a feel for how this all has an effect on the output. If you don’t understand the scaling systems and know how to scale logs, you could lose your shirt before the logs are even sitting on your deck. 🙂 Of note is that I do not talk about log grade here either, which also affects cost. That is another level. Mostly what I get are grade 2 or 3 logs, or worse (pulp). Grade 1 logs (or veneer) can be big bucks. I can’t play in those sandboxes.
Now to the actual milling. First I have to get the log on the mill and decide which face I will use to open the log. In this case I decided to put the worst face up first. Here is that log clamped up and ready to cut. (I should mention here that this log is from a ‘yard tree’ so I scanned it for any metal like nails, fence wire, etc. If I hit metal in the log my blade is toast and this becomes a very expensive log fast. One small fence staple can destroy a $20 blade in about 2 seconds.)
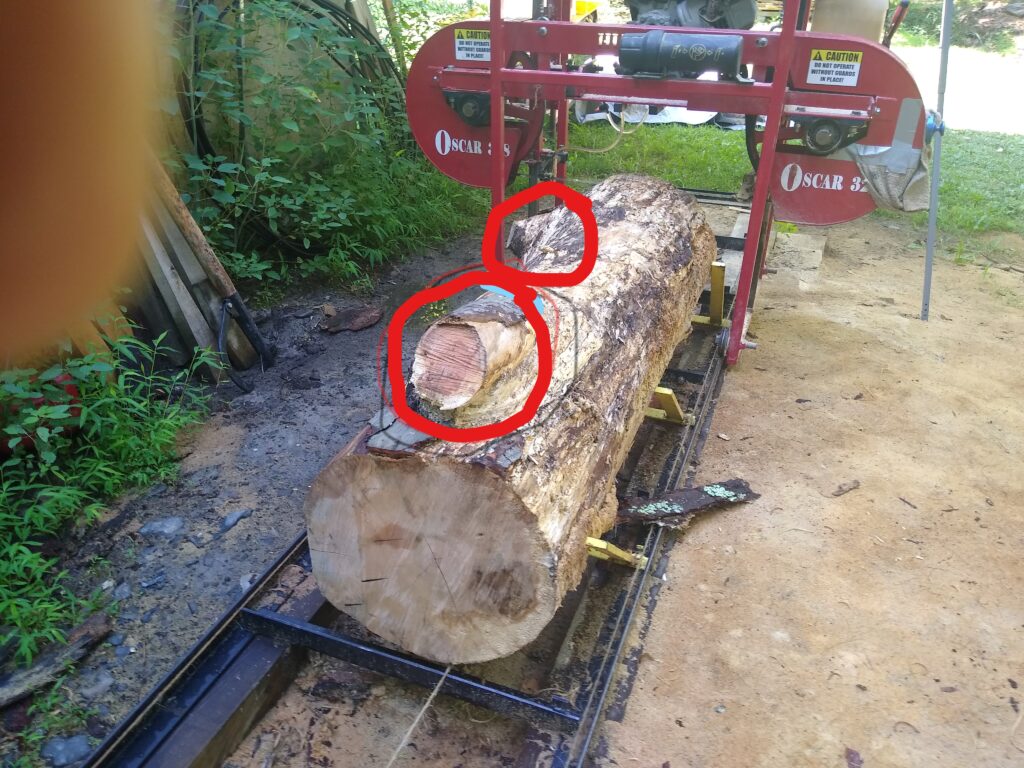
Picking the opening face sets the stage for how your day will go from here on.
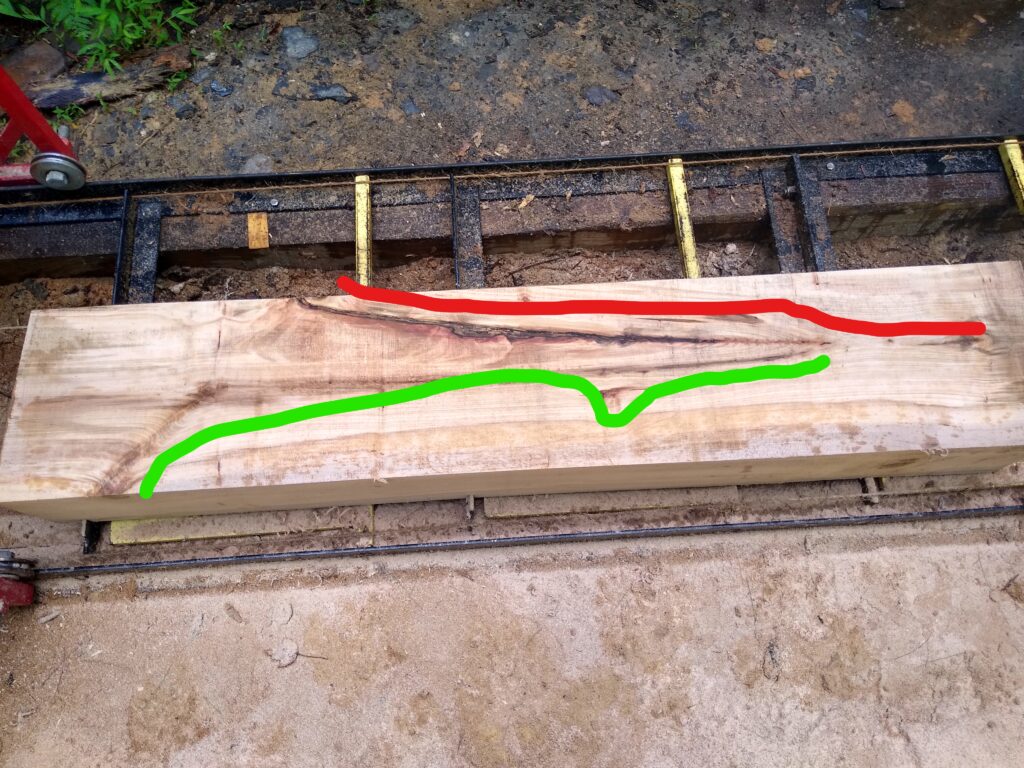
You will see that I elected to put the biggest defect (large spur) right on the top and the second biggest defect (smaller spur) on the right side of the log as the mill sees it. This means that the opening (first cut on the first face) will remove the biggest wart, and when I flip the log 90 degrees clockwise as seen in this photo, the second wart will come off with the opening cut on the second face. Sometimes my first flip is 180 degrees but because of these major defects and their locations, this was a better decision for this log.
What you can’t see in the above photo is that this log has some taper I want to take out if I can. The end facing you is much lower than the far end. We do this by placing a toe board (I dunno, that’s just what we call it) under the lower end to lift it up a bit. You can measure this to get it close, but I just do it by eye to make it ‘less worse’ than it is. So the photo below shows my ‘toe board’ which in this case is just a felling wedge I use for this purpose. It lifts the low end of the log a little more than 3/4” and that’s close enough.
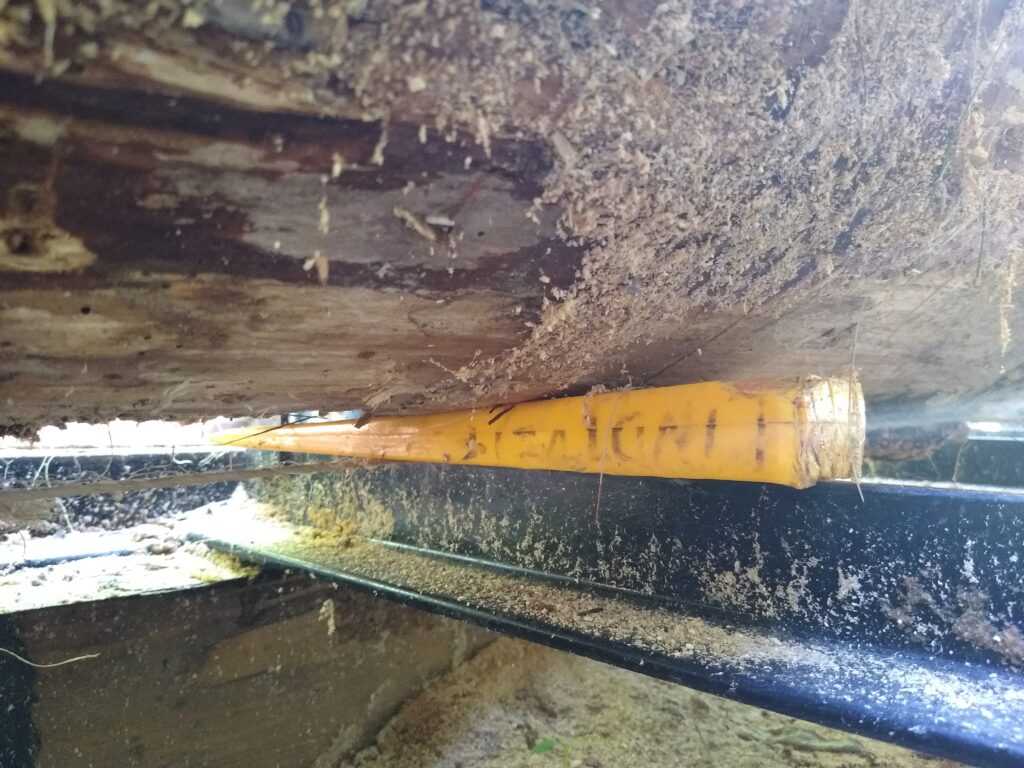
Toe boards can be just a block of wood, or some fancy hydraulic cylinder doo-dad.
At this point, we are ready to start ‘doing something’. I check to make sure all tools are clear, log clamps are tight, and I didn’t forget anything. I start the mill and warm it up for a few seconds while I get the blade lube (I use rainwater in summer, It’s pretty cheap) flowing at a good rate, then crank the mill up to max RPM and make the cut, which only takes about 30 seconds. I idle it down, shut off the water and throw the slab on the firewood pile. Here is what we find:
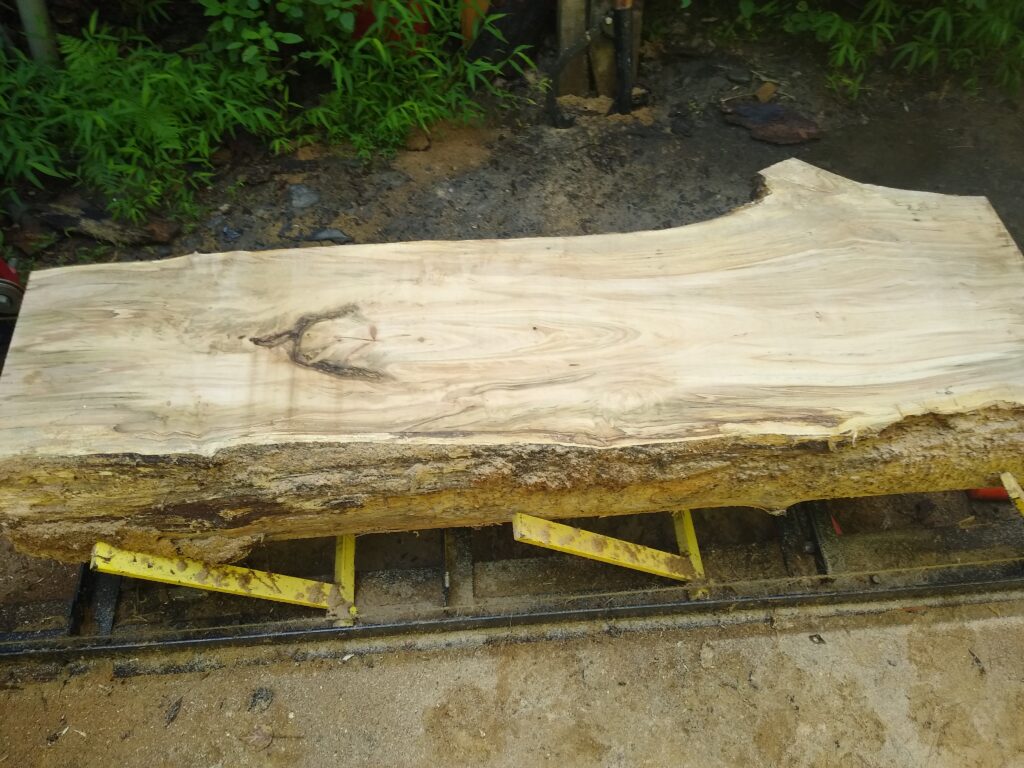
Ambrosia Maple! Surprise!
This is called Ambrosia Maple. It’s not a species, it is a ‘condition” and if you google the term you will find out all about what causes this. I did not expect this, you can seldom predict it. It is a defect that adds value to a lot of folks. In case you can’t see it in the photo, there are neat streak of green, violet, several browns and some grays in different hues. I took a 4/4 board off this side, just because of the colors, then moved on the face #2, again setting the toe board to keep that taper to a minimum. Which Looked like this:
Not too shabby for junky wood.
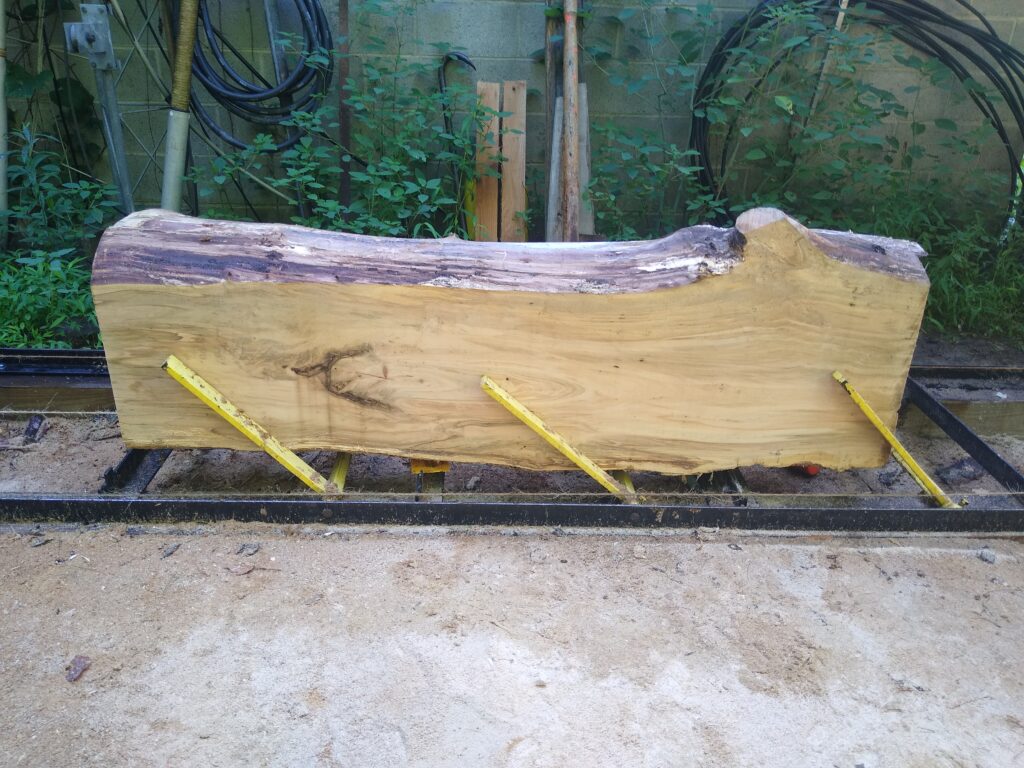
It still has color, but also has knots we didn’t see on the first face. I took no boards off this face, and moved onto face #3, which looked good but had some more, yet different knots:
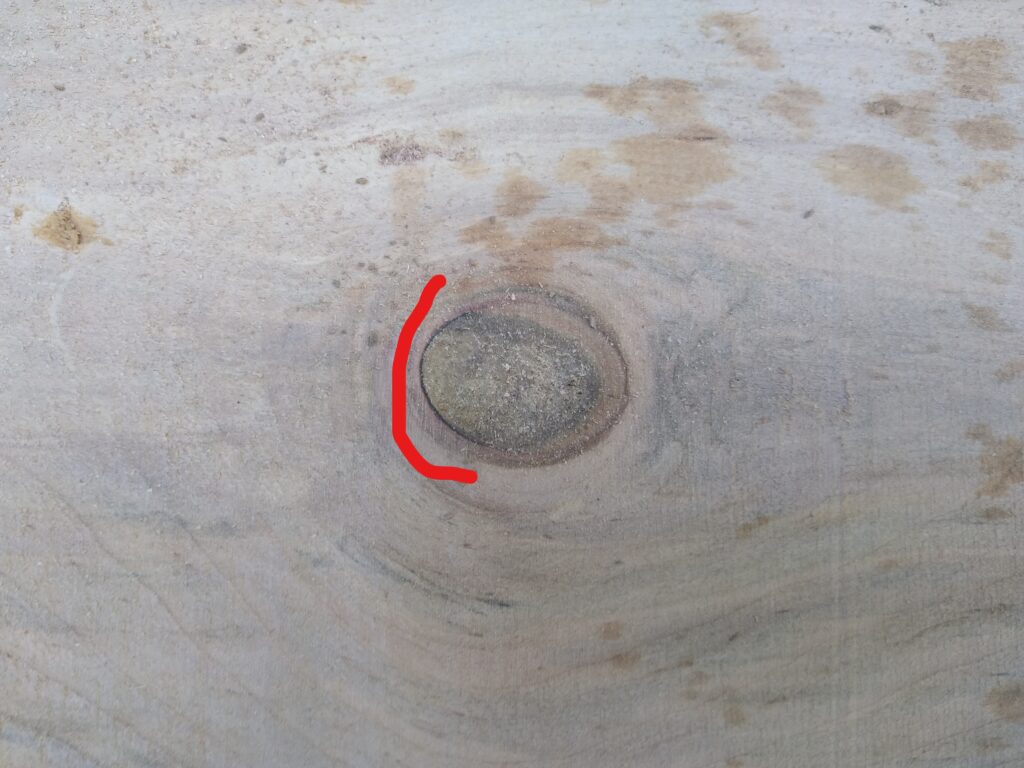
This knot will be a problem later.
Of note in the above photo is the difference in these knots verses most others. See where I highlighted the photo in red and the dark black line just to the right of the line I drew. I am pointing out an air gap here. This is a knot from an early branch which dies off as the tree grew, and the tree grew over it. because of that little air gap, I know this knot will likely fall out when the wood is fully dry. So onto the last face, #4:
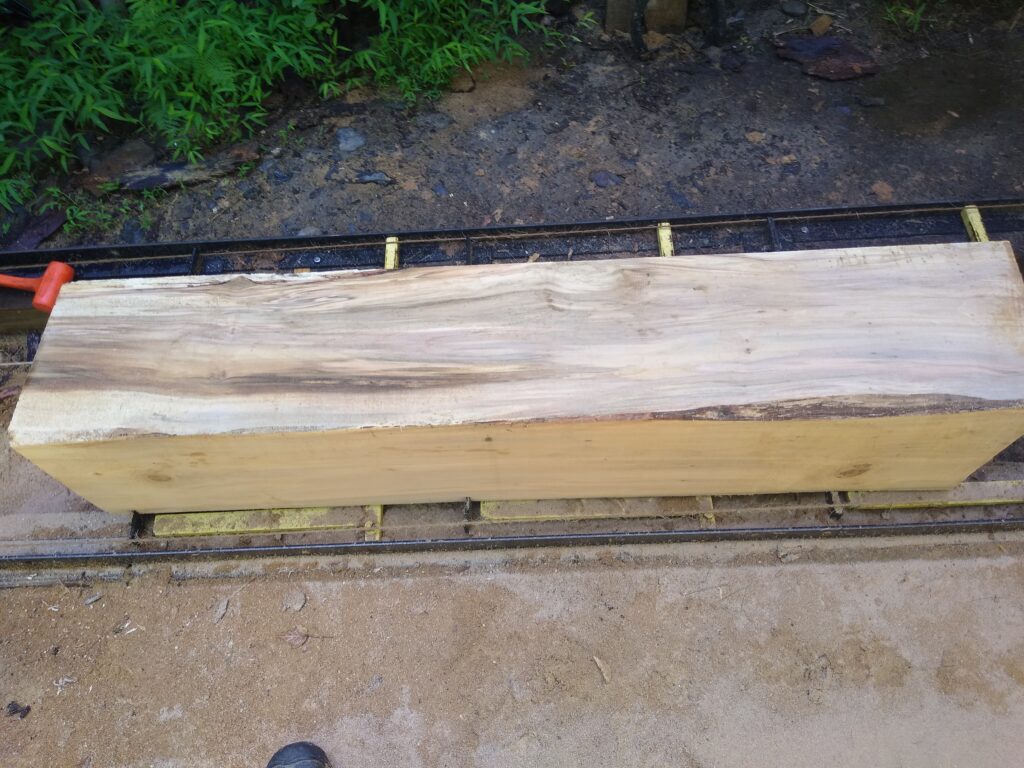
Probably the best face on the cant.
This gives us a finished ‘cant’ which is a squared off log and the nicest and clearest face. This is why I started with the worst face and hoped to end up on the best one. This time I got lucky. Otherwise I would have to go find that face and start from there making boards. Now there were 2 purposes I have for this little log. The first was some good wide 4/4 boards that might be used to make dance boards (google that one too if you need to), and the second was to make stickers (to space boards for drying). If the log turned out to be very poor, I would have made the whole thing into stickers, but as you see it now I had a feeling there were some good clear boards to be had here. So at this point I want to plain saw this cant just taking slices right down to the bottom. Now normally, you want to make sure the pith of the log (the very center) is boxed (centered in one board). The pith is weak wood with a lot of drying stress and pretty useless unless it is in the middle of something at least 2×4 or bigger. When there is pith in boards, I cut it out and make 2 boards with no pith. Because I would be making most of this into stickers, I didn’t worry about the pith in this case. Besides, I didn’t spend more than 30 seconds setting that toe board each time and checked it by eye, I knew I would have the pith in the wrong place no matter what I did. But on this log when I got down to the pith, here is what I wound up with:
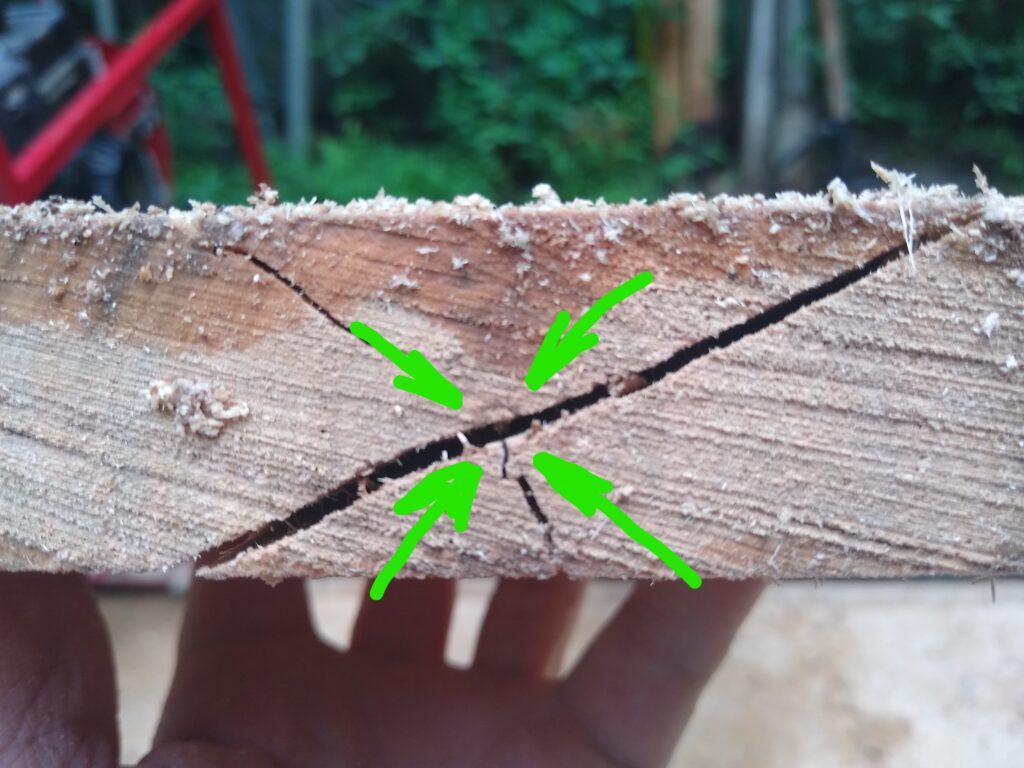
Man, I hit this one out of the park!
See that little grey circle in between the green arrows? That was the original sapling this tree grew from. That’s a tree ring, I didn’t pencil it in. I hit the pith right in the middle of the board and what is more is that the other end of this board was exactly the same, so just by eye I nailed it. Never did that before. (Probably won’t do it again either.) As you work your way down, you open up new things (mostly new defects) in different areas.
Some defects are worse than others.
Near the bottom, these cracks showed up where a major leader was growing off the main trunk. This stuff won’t hold up when dry at all, in fact, when I cut stickers from it, they fell apart as I took them off the mill bed. All fine for the intended purpose. So here are the boards I got off that cant, all 1 x 11 x 5’:
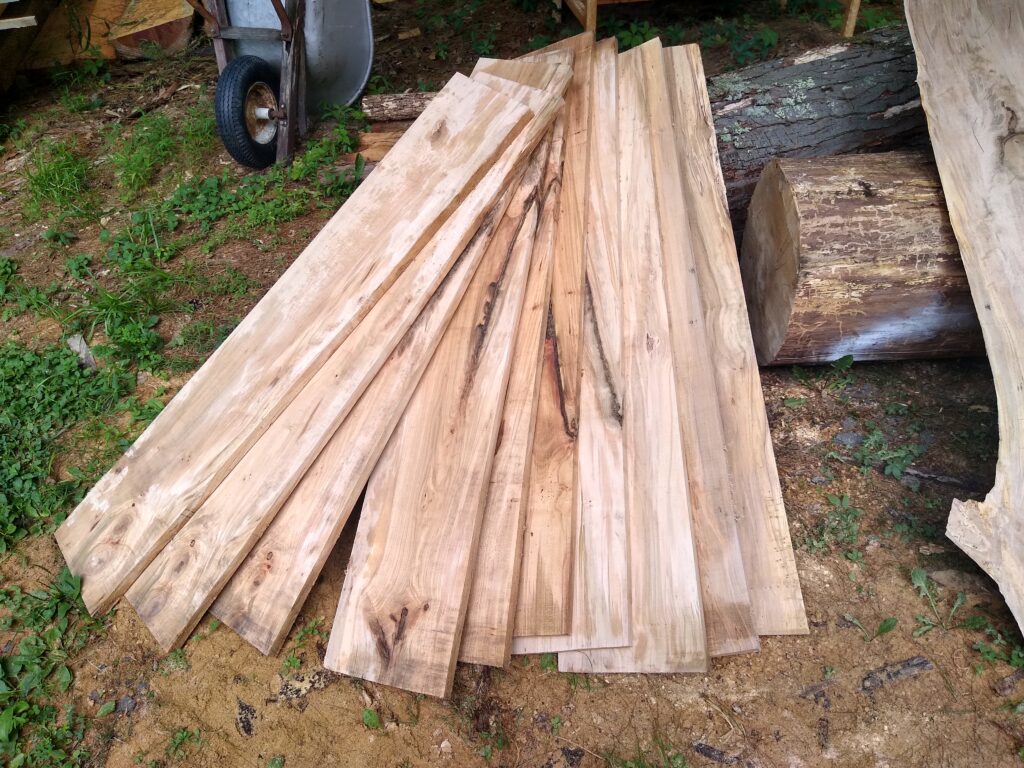
Some of these are very pretty, others not so much.
I pulled 5 of those boards to dry as is, nice stuff. The rest I stacked up on the mill again and cut 4/4 in the other direction making 1” x 1” square stickers and I got about 65 stickers.
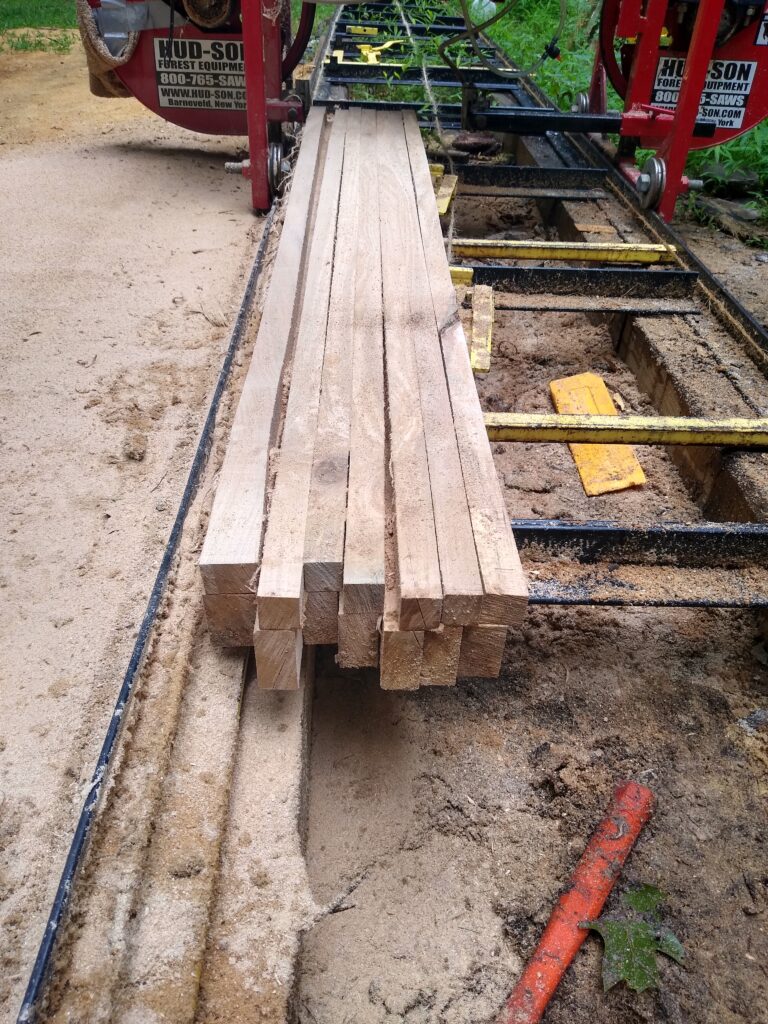
So now lets take another look at those numbers: I got 5) 1 x 11 x 5’ boards for 23BF and 65 stickers that came to 27BF which together is 50BF as opposed to the 65BF prediction that I never expected to make on this log. So, not bad. I ‘spent’ almost exactly 2 hours of time (no breaks, FB, phones, or other distractions), a pint of gas, a gallon of water, a cupful of sweat, and about $10.00 wear on the blade. If it was all reasonable grade and sound wood (it is not) and I sold it at my current going rate for Maple which is $2.50/BF that would come out to $62.50 an hour for me, the mill, supplies and all to split as needed. (But the reality is, I had 65 stickers I can’t sell, so there is only 23BF that is salable and would bring 24.50 for my 2 hours of work, ($12.25/hr) before costs. Assuming the buyer I find doesn’t succeed in asking if I can give him a break on the cost which most folks do.) I figure the supplies come to about $10/hr (blade costs and gas mostly) so that leaves me about $50. to set aside for mill repairs and other stuff. [EDIT: A savvy reader just pointed out that I made no mention of the original log cost, which is true. This log I got for free by picking it up. If I had bought it I would have paid between $.25 and $1.25/BF or $16.25 to $81.00 for the log, so figuring that cost in explains why I would not normally mill this log.) In reality, everything goes into the mill and I get nuttin’. 🙂 But this wood has to dry, and I have to find someone to buy it, that can take a year or more, so as of yet, I have not made a penny, but I just spent a bunch of pennies to make it that won’t be replaced soon. This is certainly no way to get rich, that is certain. So really a lot of work for what I get out of it. But I do have fun. I love the feeling of opening a log like this and getting a nice surprise. I do love pulling something useful out of these old logs and then selling it to someone tom make something special. Until you have done that, you will just have to take my word for it, it’s pretty cool.
Any Questions? Just leave a comment below and I’ll do my best to answer.